
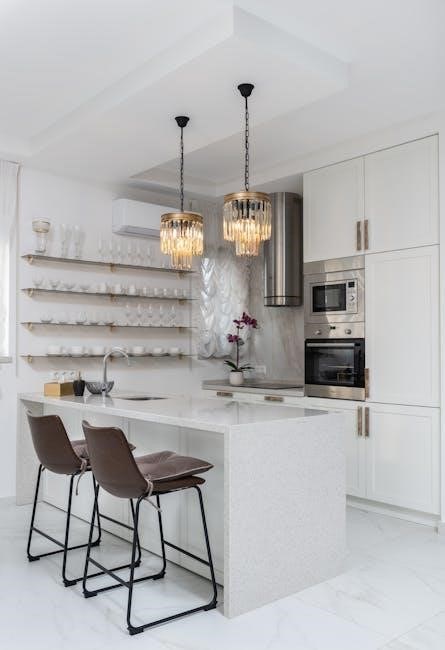
self cleaning viking oven instructions
Viking ovens feature an innovative self-cleaning mechanism that simplifies maintenance by using high heat to incinerate food residue‚ leaving only ash for easy removal. This technology reduces manual labor and ensures a pristine cooking environment‚ making it a popular choice for home cooks and professionals alike.
1.1. Overview of the Self-Cleaning Feature
The self-cleaning feature on Viking ovens utilizes high heat to incinerate food residue‚ converting it into ash that can be easily wiped away. This pyrolytic cycle operates at extreme temperatures‚ typically around 900°F‚ ensuring a thorough cleaning process. The mechanism is designed to minimize manual effort‚ offering a convenient and efficient way to maintain a pristine oven interior without harsh chemicals or extensive scrubbing.
1.2. Benefits of Using the Self-Cleaning Function
Using the self-cleaning function on Viking ovens offers numerous benefits‚ including time savings‚ reduced manual effort‚ and a deeper clean. The high-heat cycle effectively removes stubborn food residues and stains‚ eliminating the need for abrasive cleaners and minimizing odors. Regular use of this feature extends the oven’s lifespan by preventing grime buildup and maintains its performance‚ ensuring optimal cooking results and a hygienic environment for food preparation.
Understanding the Self-Cleaning Cycle
The self-cleaning cycle uses high heat to burn food residue into ash‚ simplifying cleanup. It typically runs for 2-4 hours‚ depending on soil level‚ ensuring a thorough cleanse.
2.1. How the Self-Cleaning Mechanism Works
The self-cleaning mechanism uses high heat‚ typically around 900°F‚ to incinerate food residues into ash. The oven door must be fully closed and latched to activate the cycle. During this process‚ the oven reaches extreme temperatures‚ breaking down tough stains and grime. Once complete‚ the ash can be easily wiped away‚ leaving the interior clean. This pyrolytic process is efficient and minimizes manual scrubbing‚ though proper preparation and safety precautions are essential.
2.2. Step-by-Step Activation of the Self-Cleaning Cycle
To activate the self-cleaning cycle‚ ensure the oven is empty of racks and large debris. Close the door completely and verify it is securely latched. Select the self-cleaning mode using the oven’s control panel. Set the desired temperature or duration as per the manufacturer’s instructions. Once confirmed‚ the cycle will begin‚ heating the oven to high temperatures to incinerate food residue. Allow the cycle to complete before opening the door and wiping away the ash.
Pre-Cleaning Preparation
Before initiating the self-cleaning cycle‚ remove large food debris and ensure the oven door is tightly closed. For optimal results‚ manually clean racks and the door as needed.
3.1. Removing Large Food Particles Before the Cycle
Before starting the self-cleaning cycle‚ remove large food particles using a plastic scraper or soft brush to prevent them from burning and creating stubborn residue. This step ensures the cycle runs efficiently and avoids damage to the oven surfaces. Cleaning racks and the oven door beforehand also improves results and simplifies the overall process.
3.2. Cleaning the Oven Door and Racks
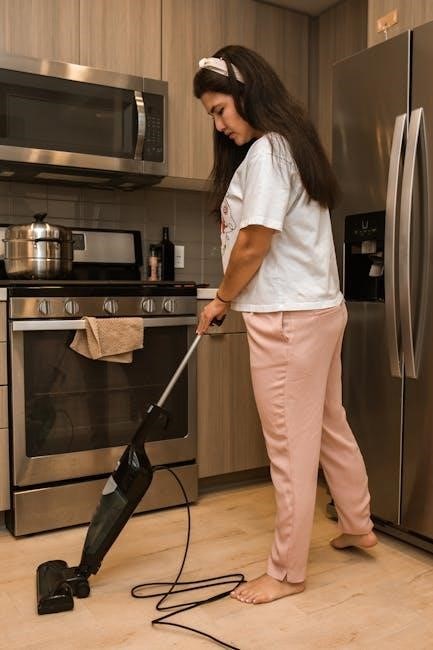
For optimal results‚ clean the oven door and racks before or after the self-cleaning cycle. Use a cream cleaner like Bar Keepers Friend or Easy-Off Fume Free Max on the door‚ applying with a damp sponge. Remove racks and soak them in warm‚ soapy water or apply the same cleaner. Avoid harsh chemicals or abrasives to prevent damage. Regular cleaning ensures a spotless appearance and maintains functionality.

Common Issues and Troubleshooting
Common issues with Viking ovens include malfunctioning self-cleaning mechanisms or error messages. Ensure the door latch is secure and consult the manual for troubleshooting steps to resolve these problems effectively.
4.1. Why the Self-Cleaning Function Isn’t Working
The self-cleaning function may fail due to an improperly closed or latched oven door‚ preventing the cycle from initiating. Additionally‚ error messages on the control panel or a faulty latch mechanism can disrupt the process. Ensure all racks and large food particles are removed before starting the cycle‚ as obstructions can hinder proper operation. Always refer to the user manual for specific troubleshooting guidance.
4.2. Fixing a Malfunctioning Self-Cleaning Mechanism
If the self-cleaning mechanism fails‚ first ensure the oven door is fully closed and latched. Check the control panel for error messages and reset the oven if necessary. For manual cleaning‚ use a gentle cleanser like Barkeepers Friend to remove stubborn residue without damaging surfaces. Avoid harsh chemicals or abrasive scrubbers‚ as they may harm the oven’s finish. Always consult the owner’s manual for model-specific troubleshooting steps.
Maintenance and Safety Tips
Regularly inspect and clean the door gasket to ensure a tight seal. Use gentle cleansers to avoid damaging surfaces. Always follow the owner’s manual for safe operation.
5.1. Regular Maintenance for Optimal Performance
Ensuring optimal performance of your Viking oven requires consistent upkeep. Regularly clean the oven racks‚ grease catcher‚ and drip pan to prevent residue buildup. Check the door gasket for wear and tear‚ as a damaged seal can affect cooking efficiency. Additionally‚ wipe down exterior surfaces with a gentle cleanser to maintain appearance. Always refer to the owner’s manual for specific maintenance recommendations to keep your oven functioning at its best.
5.2. Safety Precautions During the Self-Cleaning Cycle
Always follow safety guidelines during the self-cleaning cycle. Never open the oven door or interrupt the cycle once it has started‚ as extreme heat can cause burns. Ensure the room is well-ventilated to avoid fume inhalation and keep children and pets away. Avoid using abrasive cleaners or harsh chemicals‚ as they can damage the oven’s finish. Additionally‚ the door latch will automatically lock during the cycle for added safety.
Additional Cleaning Tasks
Beyond the self-cleaning cycle‚ regular wiping of surfaces and cleaning of racks‚ grease catchers‚ and drip pans ensures a well-maintained Viking oven‚ enhancing performance and longevity.
6.1. Manual Cleaning of the Oven Interior
For manual cleaning‚ apply a cream cleaner like Easy-Off Fume Free Max to the interior surfaces with a damp sponge. Focus on racks‚ walls‚ and the floor; Let the cleaner sit for 15-30 minutes before wiping down with a soft cloth. For tough stains‚ use Barkeepers Friend or a gentle scrubber. Avoid abrasive materials that might scratch the surfaces. Always ensure the oven is cool before cleaning to prevent burns or damage.
6.2. Cleaning the Grease Catcher and Drip Pan
Remove the grease catcher and drip pan‚ washing them with hot water and mild detergent. For stubborn grease‚ soak them in soapy water or use a grease remover like Fantastic spray. Scrape off tough spots with a plastic spatula to avoid damage. Rinse thoroughly and dry before reinstalling. Regular cleaning prevents grease buildup and maintains your Viking oven’s efficiency and hygiene.
Using the Right Cleaning Products
Use recommended cleaners like Barkeepers Friend or TORNADO (RA005C) for the glass. Avoid caustic or abrasive chemicals‚ as they can damage surfaces. Always follow the manual’s guidelines.
7.1. Recommended Cleaning Solutions for Viking Ovens
For optimal results‚ use mild yet effective cleaning products like Bar Keepers Friend or Easy-Off Fume Free Max for gentle yet thorough cleaning. Weiman Stove & Grill Cleaner is also ideal for tackling tough grime without damaging surfaces. Avoid harsh chemicals or abrasive scrubbers‚ as they can harm the oven’s finish. Always follow the product instructions and test a small area first to ensure compatibility.
7.2. Avoiding Harmful Chemicals and Abrasives
Avoid using caustic chemicals‚ abrasive cleaners‚ or scrubbers‚ as they can damage the oven’s finish or harm its components. Never use bleach‚ ammonia‚ or metal scourers‚ as they may discolor or scratch surfaces. Instead‚ opt for gentle‚ non-abrasive cleaners specifically designed for ovens. Always follow the manufacturer’s guidelines to ensure the longevity and safety of your Viking oven.
Deep Cleaning the Oven
Deep cleaning involves removing tough stains and carbon deposits. Use a cream cleaner like Barkeepers Friend for manual scrubbing or high-temperature cycles for thorough cleaning.
8.1. Removing Tough Stains and Carbon Deposits
For stubborn stains and carbon buildup‚ apply a cream cleaner like Barkeepers Friend or TORNADO to the affected areas. Let it sit for 10-15 minutes before scrubbing gently with a damp sponge. Avoid abrasive materials that may scratch surfaces. For deeper cleaning‚ run a self-cleaning cycle‚ which heats the oven to 900°F‚ turning residue into ash that can be easily wiped away. Always follow the manufacturer’s guidelines for safe and effective cleaning.
8.2. Cleaning the Oven Glass and Exterior
For the oven glass‚ apply a gentle cleaner like Easy-Off Fume Free Max with a damp sponge‚ wiping in circular motions. Avoid abrasive materials. For tougher spots‚ use Barkeepers Friend‚ then rinse thoroughly. The exterior can be cleaned with a microfiber cloth and mild detergent. For stainless steel surfaces‚ use a specialized stainless steel cleaner to maintain shine and avoid streaks. Avoid harsh chemicals or abrasive materials to prevent damage.
Troubleshooting Common Errors
Check error messages for specific solutions. Ensure the oven door is fully closed and latched. If the cycle fails‚ restart the oven and retry the process.
9.1. Error Messages and Their Solutions
Common error messages include “LOCK” or “F1” codes. “LOCK” indicates the door latch is open; ensure it is closed securely. “F1” suggests a control panel issue; resetting the oven by unplugging it may resolve this. Refer to the user manual for specific error codes and solutions. Always follow safety precautions when troubleshooting electrical components to avoid injuries or further damage.
9.2. Resetting the Oven After a Failed Cycle
If the self-cleaning cycle fails‚ unplug the oven for 30 minutes to reset the control panel. Plug it back in and ensure the door is fully closed before restarting the cycle. If issues persist‚ consult the user manual or contact a professional technician for further assistance to resolve the malfunction effectively.
Regular maintenance and proper use of the self-cleaning feature ensure your Viking oven performs optimally. Always refer to the manual for specific instructions and safety guidelines.
10.1. Best Practices for Long-Term Maintenance
- Regularly clean the self-cleaning mechanism to ensure optimal performance.
- Use oven liners or mats to catch spills and simplify cleanup.
- Avoid harsh chemicals and abrasive cleaners to protect the oven’s finish.
- Check and replace the door gasket if it shows signs of wear.
- Wipe down surfaces after each use to prevent residue buildup.
- Allow the oven to cool completely before deep cleaning.
10.2. Final Tips for a Spotless Viking Oven
For a spotless Viking oven‚ always follow the owner’s manual for self-cleaning cycles and maintenance. Clean spills immediately to prevent tough residue. Use gentle cleaners like Bar Keepers Friend for manual cleaning. Avoid abrasive materials that can scratch surfaces. Season grates after cleaning to maintain their non-stick quality. Regularly inspect and clean the grease catcher and drip pan. Ensure the oven cools completely before wiping down surfaces. This ensures longevity and optimal performance.